Have you ever wondered what myofascial cupping is?
Well stick around today and I’m going to show you how it works.
I’m Scott from Lakelands and Miami Physio and I’m going to show you how to use these cups.
The technique that I’ve learned is called functional release cupping. It’s not just traditional Chinese medicine cupping, it’s a little bit different, it’s more of a Western style.
We don’t just put the cups on and leave them to do their job. We place the cups, allow you to get used to them and then we’ll get you moving around. Over your treatment it increases your range of motion through multidirectional pull on the fascial tissue that surrounds muscle.
Fascia is a thin casing of connective tissue that surrounds and holds every organ, blood vessel, bone, nerve fiber and muscle in place. The tissue does more than provide internal structure; fascia has nerves that make it almost as sensitive as skin. When stressed, it tightens up. Myofascial cupping is a soft tissue therapy that uses negative pressure, or suction, on the skin to create a three-dimensional pull, bringing the underlying fascia, blood and other fluids closer to the surface of the skin. This promotes healing and can reduce pain too.
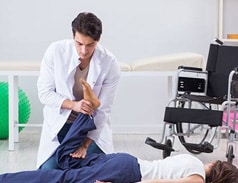
We’ve got Shelley here, she’s our model today. She’s got real tight hamstrings to demonstrate with us. To begin, we’re going to start with a toe touch test – it’s about 12 centimetres on the ruler away from Shelley’s toes.
From here, what we’ll do is, we’ll roll Shelley over onto her tummy. Start off with some wax that we use here with the cups. It keeps the cups nice and slide-y, so they can suck the skin up into an appropriate manner.
So you can see here how we’ve got the skin coming up into the cup. That’s giving a three directional pull to the fascia as it pulls it through.
We’re going to start with some gentle movements to get Shelley’s body nice and loosey goose and used to the cups. From here, I’m going to do the work first and just move Shelley through these kinds of ranges, moving her legs for her. As she gets to a tight spot, we’re going to move back and just keep slowly repeating that movement. As it becomes a really comfortable, I’m going to hand it over to Shelley to do the movements in a more active manner.
Then we move into the next phase of treatment, we’re getting Shelley up onto her feet and moving around through that aspect and I’m going to put some more cups onto Shelley’s lower back.
All right, so now the fun stuff. Shelley is going to reach down and try and touch her toes.
You can see that there’s a lot of tension actually through her lumbar area. The skin is quite red underneath the cups on her lower back – these red marks are completely normal. In my experience, it means that they’re actually tighter in that area, so it draws the blood into the cups.
We’ve added some cups to Shelley’s calf now too, and she will continue the movement to touch her toes.
Shelley reported at this point in the treatment that she feels like she is able to stretch further too now – “I mean I’m nearly at the floor, which is quite unusual for me.”
The good thing about this cupping technique is that it’s not one size fits all. We actually test your movement directly and then we cater it to your needs essentially from there.
Moving into the next phase of treatment, Shelley’s feeling pretty comfortable, so we’re going to actually spice it up a little bit and change up the movements.
This is really good for your balance and your neuro system as well, because not only are you incorporating the cups onto it, it’s more of a proprioception as well – you can feel all the spots where the cups are attached.
Finally, we’ll get Shelley on the table now and test out her range of motion.
Shelley is able to touch her toes now and it’s about 23 centimetres and before it was 12cm. So we’ve had 11 centimetres increase in Shelley’s range of motion.
This treatment can work for everyone. You can see Shelley’s very comfortable moving to touch her toes now.
The fascial connections have such a big influence on your muscles and how your muscles move!

